Materials & Supplies
Getting Your Supplies Together!
Congratulations on taking the leap into intuitive painting and deciding to setup your own art space or studio. Below are recommendations for supplies that I use in my studio and on my retreats.
If you DON’T have any art supplies at this point, I am going to give you links to the various brands of supplies that we know, love and use in our live workshops. But just remember there is no need to get those exact brands when you are shopping for your stuff. Make it easy on yourself and get whatever is readily available.
Because the intuitive painting process is largely about play and accessing your inner child as you create, I AM going to recommend that you use the simplest materials possible. It’s also a good idea to use art supplies that are relatively inexpensive. It is much easier to surrender, allow yourself to not be perfect and venture into unknown territory if you are not feeling the pressure to create a masterpiece. That desire to create a totally amazing painting is much more likely to come up for you if you are using costly canvases and high quality oil or acrylic paints.
The basics
The basic supplies you will need are:
- paint
- brushes
- a palette
- a water container
- paper
- push pins or t-pins
- masking tape
- support surface or easel
I go into more detail about these supplies below.
A note on the sources…
Along the right hand side of this page in each section you will find links to various vendors and sources where you can find the materials we discuss. Please note that there is no need to buy your supplies through any of these links if you can find cheaper local sources. We have included these links as a convenience so you can see what the online prices are.
To make things a little easier…
We have put together a Wish List with the popular online art supply store Blick for easy one stop shopping. Again, there’s no need to buy from Blick and we don’t receive any reimbursements from them. This just makes it easier if you’re brand new to the process and don’t want to have to look all over the place to get your basic supplies. In addition, you don’t have to buy everything on the list. You can pick and choose what works best for you.

Paint
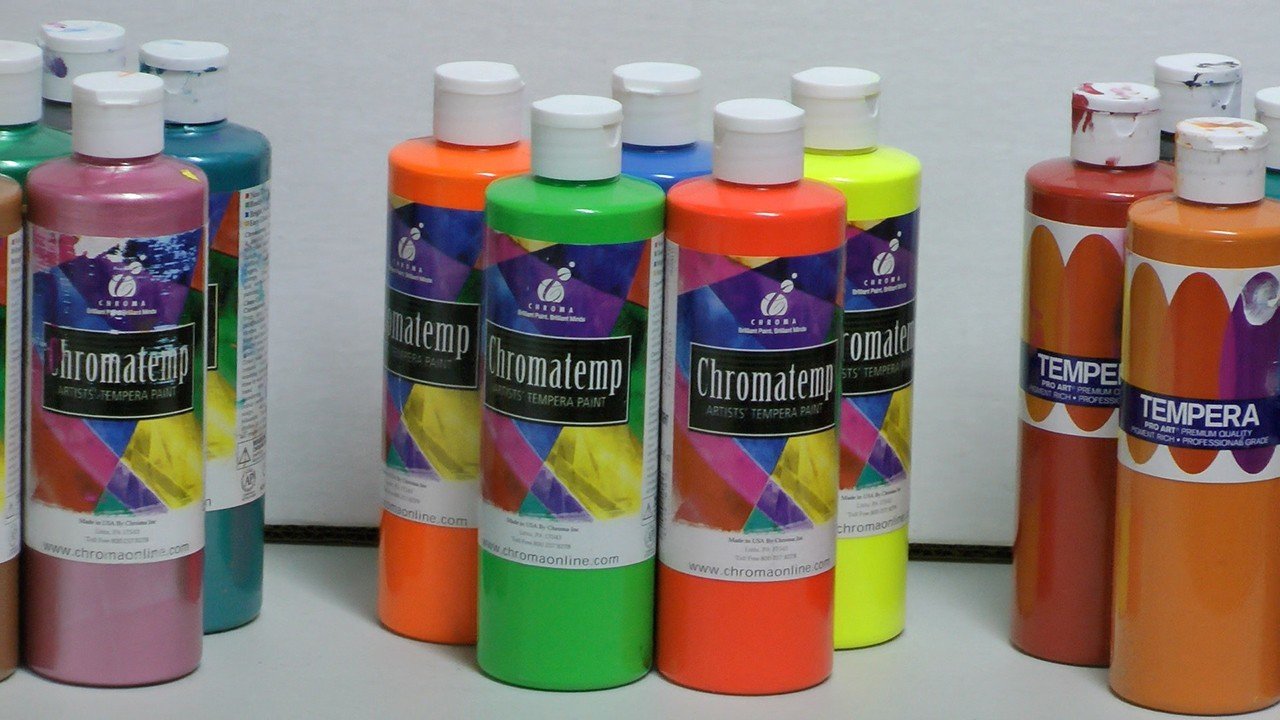
The paint that I use at all my workshops and my studio is called tempera paint. It is commonly used in schools by children or teens. It is relatively inexpensive and flows very easily. It works well for experimenting and trying new things. It covers well and can be diluted with water for softer effects. Tempera paints are water soluble and safe for all ages. In general they are washable, but some of the pigments will be harder to remove than others so it’s a good idea to use an apron or old shirt when painting if you’re worried about your clothes. And of course, it’s always best to wear something that you feel free to make a total mess in. You don’t want to inhibit your creative inspiration in any way!!
There are several different brands of tempera paint such as Dick Blick, Chromatemp, and Sargent Arts. Some of these brands come in student grades or premium grades. The difference is that the premium grades have more pigments and cover more opaquely. They tend to be more saturated in color and provide a more pleasing experience to paint with. However, they are also more expensive.
Colors
We recommend that you get one 16oz. (~470 ml) bottle each of these basic colors:
- black
- white
- red
- blue
- yellow
- green
- orange
- brown
- purple
- turquoise
- magenta
- peach
Most of the brands also offer additional solid colors as well as pearlescents, fluorescents, metallics, or glitter paints. These extra types of paints aren’t required but are a lot of fun to paint with.
Sizes
The paints also come in different sized bottles. We recommend getting the pint size 16oz bottles (~470 ml) for the main colors. This should give you a good amount of paint for several average sized paintings. You can get smaller 8oz sizes (~235 ml) for the pearlescent, metallic, or glitter paints if you’re interested in experimenting.
An Important Note!
When you go to buy tempera paint do NOT buy Egg Tempera paints as these are more akin to oil paints and require a lot more technique to work with. They are intended for professionals that want to paint in the classical tradition. In addition, avoid purchasing regular tempera paint in powder or cake form. If you do you will need to mix the paints yourself and getting a smooth consistency can be challenging.

Where to Buy
Basic Colors
Fluorescent Colors (Optional)
Pearlescent Colors (Optional)
Metallic Paints (Optional)
Glitter Paints & Glues (Optional)


Paper
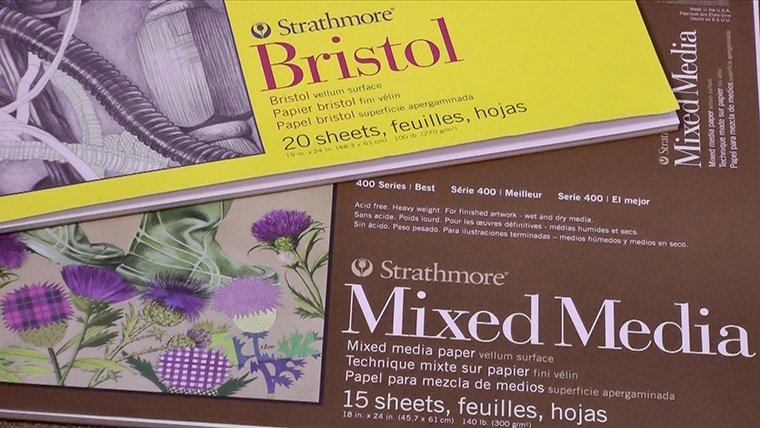
At my retreats I use 23″x35″ Accent Opaque 80 lb Cover Smooth paper by Sylvamo since it can take a lot of abuse and handle the wetness that comes from using tempera paint without falling apart. This paper is only available through a paper distributor such as Kelly Spicer. However, any mixed-media paper that has a smooth surface and is designed to be used with wet media will work.
Specifically I recommend the Mixed Media Papers by Strathmore (either the 300 or 400 series) or Canson (called Canson XL). Strathmore also sells a Bristol Vellum paper that works well. These papers are available in tablets that are 18″ x 24″ (45.7 x 61 cm) large which is a good starting point. If you decide you want a larger painting surface you can tape sheets of paper together with masking tape. These papers can also be bought in large rolls if you want to try painting really big. You want to use fairly big paper for this process since you want to be able to really move and get your body into it when you paint.
There is no need to get expensive water color papers. While these are very nice papers, they usually have a rough tooth to them that can be frustrating when working with tempera paints.

Where to Buy
Mixed Media Pads
Mixed Media Rolls
Bristol Vellum
80lb Accent Opaque Cover Smooth


Brushes
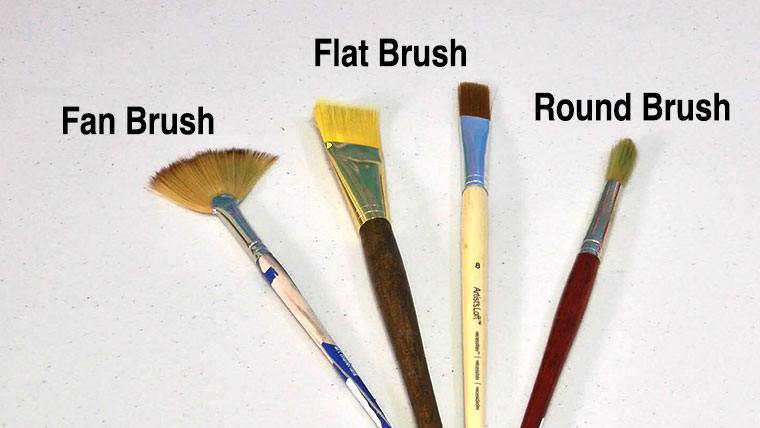
When it comes to brushes I mostly buy what’s on sale!! Although, make sure the brushes you purchase are designed to work with watercolor or acrylic, since tempera is a water based paint. What you DON’T want to get are bristle brushes because they are meant to use with oil paints and are very, very stiff. I recommend that you get three or four LONG HANDLED brushes of various sizes. I like having a one inch, half inch, #4 and #8 size brushes on hand. Although of course, you can also get much bigger or much smaller brushes if the spirit moves you.
You’ll also want to get a few different types of shapes of brushes and see which ones you like best. A round brush, flat brush, and fan brush in medium sizes would be a good starting point.
In general you’ll want to purchase synthetic brushes in the student to medium quality range. There is no reason to buy expensive sable or camel hair brushes. Although, if you want to spend the money, they CAN be a lot of fun to work with. Avoid getting SUPER cheap brushes as these may lose their bristles as you paint which can be very frustrating.
You may want to experiment with other materials for making marks such as sponges, large flat brushes (like the ones used in house painting) or rubber scrapers.
Where to Buy
Basic Brush Kit
Sponges (Optional)
Foam Brushes (Optional)

Supports and Easels
I’m going to show you a couple of different easel styles that you can use depending on your situation and how much room you have. It would be ideal to find a room or space in your home where you can leave your painting and supplies set-up for as long as you want. It can be frustrating to have to tear down and recreate your painting area every time you feel the urge to paint, so carving out a little space for your creative process will make your painter self much happier.
The main thing I want you to consider when setting up your painting area is to make sure you have some space in which to move around. When you see movies or photos of famous artists you most often see them STANDING as they paint. There is a reason for this. Painting is really a very physical act and is most powerful when it comes from the whole body. Which is something that we try and reclaim in the intuitive painting process.
If you already have a standing easel and you are going to be using the smaller Strathmore paper, you can simply attach your paper to the easel itself. If you don’t have an easel then take a look at the suggestions below for setting up something easy to paint on.
Mimimal
The simplest and easiest support method is taping your paper to a table or pinning it to the wall using push pins or masking tape. If you have a table and/or wall that you don’t mind getting paint on then you can just apply the paper directly to either of those surfaces and start painting. You can also protect your painting surfaces by pinning or taping a large piece of either plastic or paper to the wall/table and then attaching the paper you will be painting on to the now covered surface.
Small
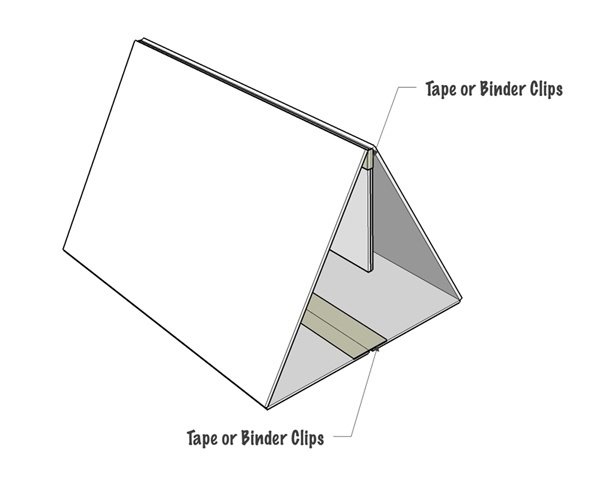
However, that method doesn’t always work so it can be helpful to make or buy a support to hold your paper. You can make a very economical and compact easel by using some cardboard or foam core to make a small triangular frame that sits on a table top.
Most stationary or office supply stores cary Presentation Boards or Science Project boards that are 3-fold cardboard or foam core panels. You can use two of these with some tape or large binder clips to make a triangular table top easel. It may be a bit wobbly so you might need to tape it to the table with masking tape.
Wall
If you have the space in your house or garage you can also make a wall support for larger paintings by using a panel of cardboard, foam core, or styrofoam up against the wall. You can usually get large panels of these (8’ x 4’ or ~2.4m x 1.2m) and use them as is or cut them down to size to meet your needs.
Cardboard
Single sheets of Cardboard will not stand up on their own so you will need to take several large sheets and tape them together. You can look for cardboard at boxing or moving companies and see if they will sell you individual sheets. Thicker is generally better when it comes to cardboard. We have used a single ply sheet taped to a double ply sheet with duct tape on all of the edges which has worked well. Two sheets of double ply cardboard would be even more rigid.
Foam core
Foam core can make a nice support but you’ll want to get at least a half inch thick sheet which can be expensive at 8’ x 4’ sizes (~2.4m x 1.2m). It should be able to stand on its own but may be a bit bouncy if you paint on it vigorously.
Insulation Foam
Many of our easels in our studios are made from insulation foam that you can purchase at hardware big box stores such as HomeDepot. Note, there are several different types of insulation foam and some are heavier and more crumbly than the ones we use. We only use the R-Tech Insulfoam in 1.5″ widths which is essentially just styrofoam with no added chemicals or retardants added to it. There is a clear plastic covering on one side and a silver reflective plastic cover on the other. These make great easels because they are easy to move around and can stand on their own without any reinforcement. (Please note that we do not recommend any other type of building foam. Some of the other foams may have added chemicals in them. Please consult with someone at your local hardware store if you have questions or concerns about toxicity).
You can cut the foam with a serrated bread knife (but be aware that the foam will pull out and make a mess) and then cover the cut edges with duct tape to keep it clean if you need to cut it down in size. Our standard easel sizes are 6’ high by 4’ wide (~1.8m x 1.2m) which is a good size. You can tape two of these panels side by side if you want to paint much bigger paintings.
We also tape 6’ lengths of 1″x 2″ (~1.8m x 1.5cm x 5cm) pine firing strips to each side to give them a little more rigidity and weight so that the panels don’t bounce around as much when you paint on them. In addition, you can mount lights to the side by clamping on to the wooden pieces.
Special Note: You will need to get long T-pins to attach your painter to the foam core panels. The regular sized push pins will not hold in the styrofoam but the longer length T-pins will work just fine.


Where to Buy
3-Fold Presentation Boards
Special note: you will need to find large cardboard or foam sheets (8′ x 4′) locally as most online vendors will only ship in very large quantities.
Foam Panel
Cardboard
Wood Reinforcement Strips
Long T-Pins


Palette
You can use anything for a palette, since a palette is just something to put your paint on. You can use an old plastic or ceramic dinner plate, a paper plate or an official paint palette from an art store.
In my studio I have a few different kinds of palettes including rectangular shaped metal or plastic palettes or metal/plastic palettes with wells.
Water Container
You will need a container that holds water so that you can rinse your brushes throughout the painting process. I like to use empty, quart sized yogurt containers, because of the size. The larger the container, the less often I have to empty it and change the water!!
Lighting
Any lighting that you have available will do. If you are looking for extra lighting then check your local hardware store for inexpensive clip lamps that you can clip onto your easel or to a door.
Note, avoid halogen work lamps. These are extremely bright but can get very hot and will be uncomfortable or even dangerous to be near.
Where to Buy
Palette
Lighting
